


putty.exe root@example.com -pw mypasswordforexamplecomuser@example.com -pw password Had you ever forget to make the backup of the registry before making some changes in it, which led to system crash? Every time you need to make changes to your registry, you should make a backup as a precaution. Making a backup is very important and helps the user when he wants to restore the changes he made.
In order to backup your registry, follow these simple steps:
In Windows 7 / Vista: Open Start menu, type regedit in Start Search and click OK.
In Windows XP: Open Start menu, click Run, type regedit and select OK.

In Registry Editor go to the File Menu and select Export.

Under the export range select All.

Put an appropriate file name and save as file type Registration Files(*.reg).

In Registry Editor go to the File Menu and select Import.

Now select the registry file(backup) that you made(using above procedure) and it will recover your settings that were before you made changes in the registry.
Apart from above, these software install shell extensions to add applications in the right-click context menu. If you delete the appropriate shell extension in the registry, you won’t get these additional menu items.
I am trying to remove the Open Presentation and Open Drawing items from the Right Click "new" menu.
Note: Make sure you have made a proper backup of your Registry. In case you have mistakenly removed the wrong folder, the backup will come handy in restoring the lost folder.to remove the New OpenDocument Text
from the menu, go to Registry Editor:
HK_CLASSES_ROOT > .odt > opendocument.WriterDocument.1
There you will see the ShellNew entry,
remove it. After you do it, refresh your desktop and you won't see the New
OpenDocument Text entry anymore. Do that for any of the other filetypes you want
to remove.
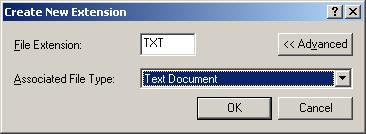
I' ve no idea, when this occurred but due to some technical malfunction, or virus issue or might be uninstallation of any text editor; I lost the option to create a New Text Document from the right click menu as well from the File menu of Windows.
As the Context Menu is totally controlled by Registry entries. So I decided to troubleshoot it.
After exploring net few moments, I found lots of ways to restore this and tried almost all of them. Among working ones, few were easy to use I am posting them here.
|
***** Windows Registry Editor Version 5.00 [HKEY_CLASSES_ROOT\.txt] "Content Type"="text/plain" @="txtfile" "PerceivedType"="text" [HKEY_CLASSES_ROOT\.txt\OpenWithList] [HKEY_CLASSES_ROOT\.txt\PersistentHandler] @="{5e941d80-bf96-11cd-b579-08002b30bfeb}" [HKEY_CLASSES_ROOT\.txt\shell] [HKEY_CLASSES_ROOT\.txt\shell\open] [HKEY_CLASSES_ROOT\.txt\shell\open\command] @="notepad.exe %1" [HKEY_CLASSES_ROOT\.txt\ShellNew] "NullFile"="" ***** |


type regedit from
start > Run and go
to
[HKEY_CURRENT_USER\Software\Microsoft\Internet
Explorer\SearchUrl]

find
the string
value "provider" and change the value to
"provider"="google" or value data to http://www.google.com/search?q=%s

|

|

|
I always wonder why on earth there are nearly a ton processes running with the name svchost.exe. What are they?
What Is It?
According to Microsoft: “svchost.exe(Generic Host Process for Win32 Services) is a generic host process name for services that run from dynamic-link libraries”. It cannot be stopped or restarted manually. This process manages 32-bit DLLs and other services. At startup, Svchost.exe checks the services portion of the registry and constructs a list of services that it needs to load. Under normal conditions, multiple instances of Svchost.exe will be running simultaneously.
Microsoft started moving all of the functionality from internal Windows services into .dll files instead of .exe files. From a programming perspective this makes more sense for reusability… but the problem is that you can’t launch a .dll file directly from Windows, it has to be loaded up from a running executable (.exe). Thus the svchost.exe process was born.
Svchost.exe groups are identified in the following registry key:
Why there are so many svchost.exes Running?
If you’ve ever taken a look at the Services section in control panel you might notice that there are a Lot of services required by Windows. If every single service ran under a single svchost.exe instance, a failure in one might bring down all of Windows… so they are separated out.
Those services are organized into logical groups, and then a single svchost.exe instance is created for each group. For instance, one svchost.exe instance runs the 3 services related to the firewall. Another svchost.exe instance might run all the services related to the user interface, and so on.
What Can I Do About It?
You can trim down unneeded services by disabling or stopping the services that don’t absolutely need to be running. Additionally, if you are noticing very heavy CPU usage on a single svchost.exe instance you can restart the services running under that instance.
The biggest problem is identifying what services are being run on a particular svchost.exe instance… we’ll cover that below.
If you are curious what we’re talking about, just open up Task Manager and check the “Show processes from all users” box:

Checking From the Command Line (Vista or XP Pro)
If you want to see what services are being hosted by a particular svchost.exe instance, you can use the tasklist command from the command prompt in order to see the list of services.
tasklist /SVC

The problem with using the command line method is that you don’t necessarily know what these cryptic names refer to.
Checking in Task Manager in Vista
You can right-click on a particular svchost.exe process, and then choose the “Go to Service” option.

This will flip over to the Services tab, where the services running under that svchost.exe process will be selected:

The great thing about doing it this way is that you can see the real name under the Description column, so you can choose to disable the service if you don’t want it running.
Using Process Explorer in Vista or XP
You can use the excellent Process Explorer utility from Microsoft/Sysinternals to see what services are running as a part of a svchost.exe process.
Hovering your mouse over one of the processes will show you a popup list of all the services:

Or you can double-click on a svchost.exe instance and select the Services tab, where you can choose to stop one of the services if you choose.

Disabling Services
Open up Services from the administrative tools section of Control Panel, or type services.msc into the start menu search or run box.
Find the service in the list that you’d like to disable, and either double-click on it or right-click and choose Properties.

Change the Startup Type to Disabled, and then click the Stop button to immediately stop it.

You could also use the command prompt to disable the service if you choose. In this command “trkwks” is the Service name from the above dialog, but if you go back to the tasklist command at the beginning of this article you’ll notice you can find it there as well.
sc config trkwks start= disabled
By default Mozilla Firefox shows the scrollbar on the right side. While left-handers want to show the scrollbar on their left side.
I'll show you a way to move the scrollbar from Right to Left in Mozilla Firefox as shown in following screenshot: Go step by step:


It was the most discussed topic I ever heard about windows.
There were lots of discussions, gossips, bets and tons of mails roaming around about "Creation of CON folder on windows OS"
I'll give you very simple one liner command to create the same.
Step 1: go to command prompt (Start > Run type cmd and enter, short key Win+R)
Step 2 : you'll get any path and prompt where cursor was blinking. Write cd\
Step 3 : type in mkdir \\.\c:\con
Step 4: you can check in cmd prompt by dir \\.\c:\con
Step 5 : delete the folder by rmdir \\.\c:\con
CON is reserved name in windows, that's the reason you neither can create nor delete the con folder using normal procedure. You have to have these smart tips to do so.
This is applicable with all the following names: CON, PRN, AUX, NUL, COM1, COM2, COM3, COM4, COM5, COM6, COM7, COM8, COM9, LPT1, LPT2, LPT3, LPT4, LPT5, LPT6, LPT7, LPT8, LPT9
Reason : these are window's inbuilt 'Reserved Device Names'
To disable the access to USB port, in windows XP and 2000, follow the steps below
1. Click Start, and then click Run.
2. In the Open box, type regedit, and then click OK.
3. Locate, and then click the following registry key:
HKEY_LOCAL_MACHINE\SYSTEM\CurrentControlSet\Services\UsbStor
4. In the right pane, double-click Start.
5. In the Value data box, type 4, click Hexadecimal (if it is not already selected), and then click OK.
6. Quit Registry Editor.To re-enable a disabled port, follow these steps below
1. Click Start, and then click Run.
2. In the Open box, type regedit, and then click OK.
3. Locate, and then click the following registry key:
HKEY_LOCAL_MACHINE\SYSTEM\CurrentControlSet\Services\UsbStor
4. In the right pane, double-click Start.
5. In the Value data box, type 3, click Hexadecimal (if it is not already selected), and then click OK.
6. Quit Registry Editor.
In Firefox, the vertical scrollbar disappears when content fits inside the viewport. This makes several layout types shift position, typically by 10 to 20 pixels.
You can make the vertical scrollbar visible all the time. Read the instructions below:
like Internet Explorer.
1. Open the HTML Editor/ Text Editor or Notepad
2. Copy & Paste following code snippet
:root { overflow-y: scroll !important; }
3. Save this file with name userContent.css in following path
C:\Documents and Settings\[Windows Login Name]\Application Data\Mozilla\Firefox\Profiles\[profile name (random string of 8 letters, a dot (.) followed by some more letters)]\chrome\
4. Restart Firefox
216.27.61.137
The four numbers in an IP address are called octets because they can have values between 0 and 255, which is 2^8 possibilities per octet.
Every machine on the Internet has a unique IP address. A server has a static IP address that does not change very often. A home machine that is dialing up through a modem often has an IP address that is assigned by the ISP when the machine dials in. That IP address is unique for that session -- it may be different the next time the machine dials in. This way, an ISP only needs one IP address for each modem it supports, rather than for each customer.
If you are working on a Windows machine, you can view a lot of the Internet information for your machine, including your current IP address and hostname, with the command WINIPCFG.EXE (IPCONFIG.EXE for Windows 2000/XP). On a UNIX machine, type nslookup at the command prompt, along with a machine name, like www.howstuffworks.com -- e.g. "nslookup www.howstuffworks.com" -- to display the IP address of the machine, and you can use the command hostname to learn the name of your machine.
As far as the Internet's machines are concerned, an IP address is all you need to talk to a server. For example, in your browser, you can type the URL http://209.116.69.66 and arrive at the machine that contains the Web server for HowStuffWorks. On some servers, the IP address alone is not sufficient, but on most large servers it is -- keep reading for details.
Here's a little known *secret* way to replace all those FTP programs.
Go to Start > My Computer.
on the Address field type: "ftp://YOURUSERNAME@ftp.YOURDOMAIN.TLD" hit enter.
e.g. ftp://username@ftp.example.com
You should get a pop up.
Enter Your Password and click Log On.
You should now have access to all the files on your server! Just like an FTP program! You can upload files to it.
It is actually built into Windows explorer and when IE detects the FTP protocol it jumps over to windows explorer. The FTP client built into windows is actually fairly limited but it is pretty useful for a quick transfer when you do not have access to a FTP client.
However, Windows explorer does not support all FTP servers. If you use FireFox you can actually get a cool little plugin called FireFTP which I use a lot and like FileZilla it's 100% free and can import your Filezilla profiles.
Smart FTP is a very cool FTP client but no longer free, FileZilla is good but a little limited. My personal preference is CuteFTP Pro. For those who want a convenient browser based FTP client FireFTP is pretty handy.
If you would like to block/unblock a website from being viewed on your Windows computer, follow these steps:
First backup thehosts file. Open hosts file with notepad. At the end of the line you can see as per below.
Append the following line at the end
Note: That will only stop the domain name to go to the website but if you know the IP address of the site from DnsStuff or NetworkTools then you can browse the site.
Toshiba laptops aren’t like most laptops where you can remove the BIOS battery and let it sit for a few hours to reset the BIOS. So what do you do? There are three forms of BIOS password removal being used currently by Toshiba:
Works with Portege, Satellite, Satellite Pro, Tecra and Libretto Laptops of the following model numbers :
100(1xx) 200(2xx) 300(3xx) 400(4xx) 500(5xx) 600(6xx) 700(7xx) 1000(1xxx) 2000(2xxx) 3000(3xxx) 4000(4xxx) 7000(7xxx) 8000(8xxx)
(A15-S 127) (1415-S 173) SERIES & Some DVD Models
The “xxx” above means that each x can be any number, i.e. 1xx could be 101, 103, 111, 112 etc.


In order to clear a BIOS of Compal manufactured units you need to use the NO POWER method, units manufactured by Inventec need to be to be POWERED ON to rest the BIOS.
To reset Compal units:

The challenge/response code method consists of matching a Challenge code ( power the machine up,press ctrl,then tab,then ctrl, then enter) generated on your machine and matching a Response code generated by Toshiba and calling a Toshiba Tech Support Agent.


